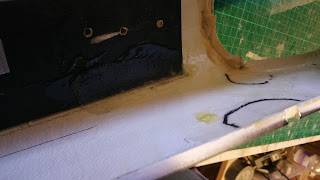
After a good rub down, the fuselage was hit with some primer last night. I'm very happy with the filler repairs, as you can't see the joins at all. There was some paint reaction unfortunately (the end of one primer can) so I will give that a tickle with fine paper and shoot those areas again. Nearly done!
Showing posts with label MB339. Show all posts
Showing posts with label MB339. Show all posts
Monday, 25 April 2016
Friday, 22 April 2016
MB339 repairs - part 2
So, everything is dry today, and the fuselage is nice and stiff. I should have weighed the assembly before and after see what the weight gain was, but I forgot. Ah well - PSS'ers fly better when they are heavy anyway. I good sanding session on the spot-putty ensued this afternoon.
More ridges gone, and a quick clean up in the second image. I am set for the P38 tonight application tonight, then it will be a bit of finish sanding along with wet & dry tomorrow, hopefully some primer by Sunday.
Thursday, 21 April 2016
MB339 Repairs
Dave Gilder unfortunately crashed this last year at the Lleyn PSSA meet - I think it was down to a rear-ward CofG. I feel a bit responsible for the aircraft's demise, as I egged him on so much to give a try in the lift. Sorry Dave.
Anyway, as penance I pestered him to let me repair the fuselage (where's the wings Dave?!), as I actually quite enjoy glassfibre repairs. Here's what I did.
First off, all cracks identified, then thin cyano run into them.
Anyway, as penance I pestered him to let me repair the fuselage (where's the wings Dave?!), as I actually quite enjoy glassfibre repairs. Here's what I did.
First off, all cracks identified, then thin cyano run into them.
A few squirts of kicker stops the cyano running, and helps the assembly stay a little more stable. 10 minutes later, and she feels quite stiff already. A quick sand with fine paper pushes some glass and dust into the cracks - these are then hit with cyano and kicker again. It acts like a "natural" filler and bonds the fibres together a bit more deep in the layers.
Next up, run around with a black marker and identify the crack areas from the inside. This allows me to make sure I haven't missed anything, and also size the glass for the interior repairs.
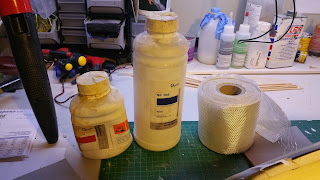
Patchy! Next up, my favourite multi-purpose laminating / finishing resin - Gurite SP106, and some heavy duty cloth I've for ages. I think it was 50 metres on there. I'm still not halfway through it after about 15 years.
Choppy choppy! These are all the patches laid out in sequence.
Time for some music and epoxy mixing!
Oh, I removed this rear strake as I need to make a copy for the other side (I assume its on a Welsh hill) plus it makes it easier to turn the fus over.
About 15 minutes later, the patches are in.
You can see some wetness, but trust me - all epoxied in. I use a wide soft disposable brush to apply, and stipple it in. Job's a good 'un.
Then whilst that's drying, I moved to the outside for the only really stinky bit - 3M glazing putty. This is essentially thick paint and is pushed into all the ridges on the outside that aren't too deep. The big ones will get P38-type body filler as the red stuff shrinks too much as it dries for deep holes. I masked off an area here to protect some Arabic text that looked like an expensive decal that I didn't want to hurt.
A quick rub down tomorrow, and I will then mix some P38 - I need some for the Vulcan anyways, After that's dry, its time for some masking and a hit of primer. Until next time!
Subscribe to:
Posts (Atom)


