Showing posts with label Globemaster. Show all posts

Tuesday, 14 June 2022

C17 Globemaster III @ 1/15th scale - for PSS

Last week Bob and I saw that there was an upcoming big SW wind, so a plan was hatched to get to the Orme as early as possible to get two maidens done. I got up at 5am and made the 3 hour trip with a car full of C17, to be greeted by a 55mph SW on the top of the rock. Wow! If she doesn't fly in this, she is definitely going in the bin.


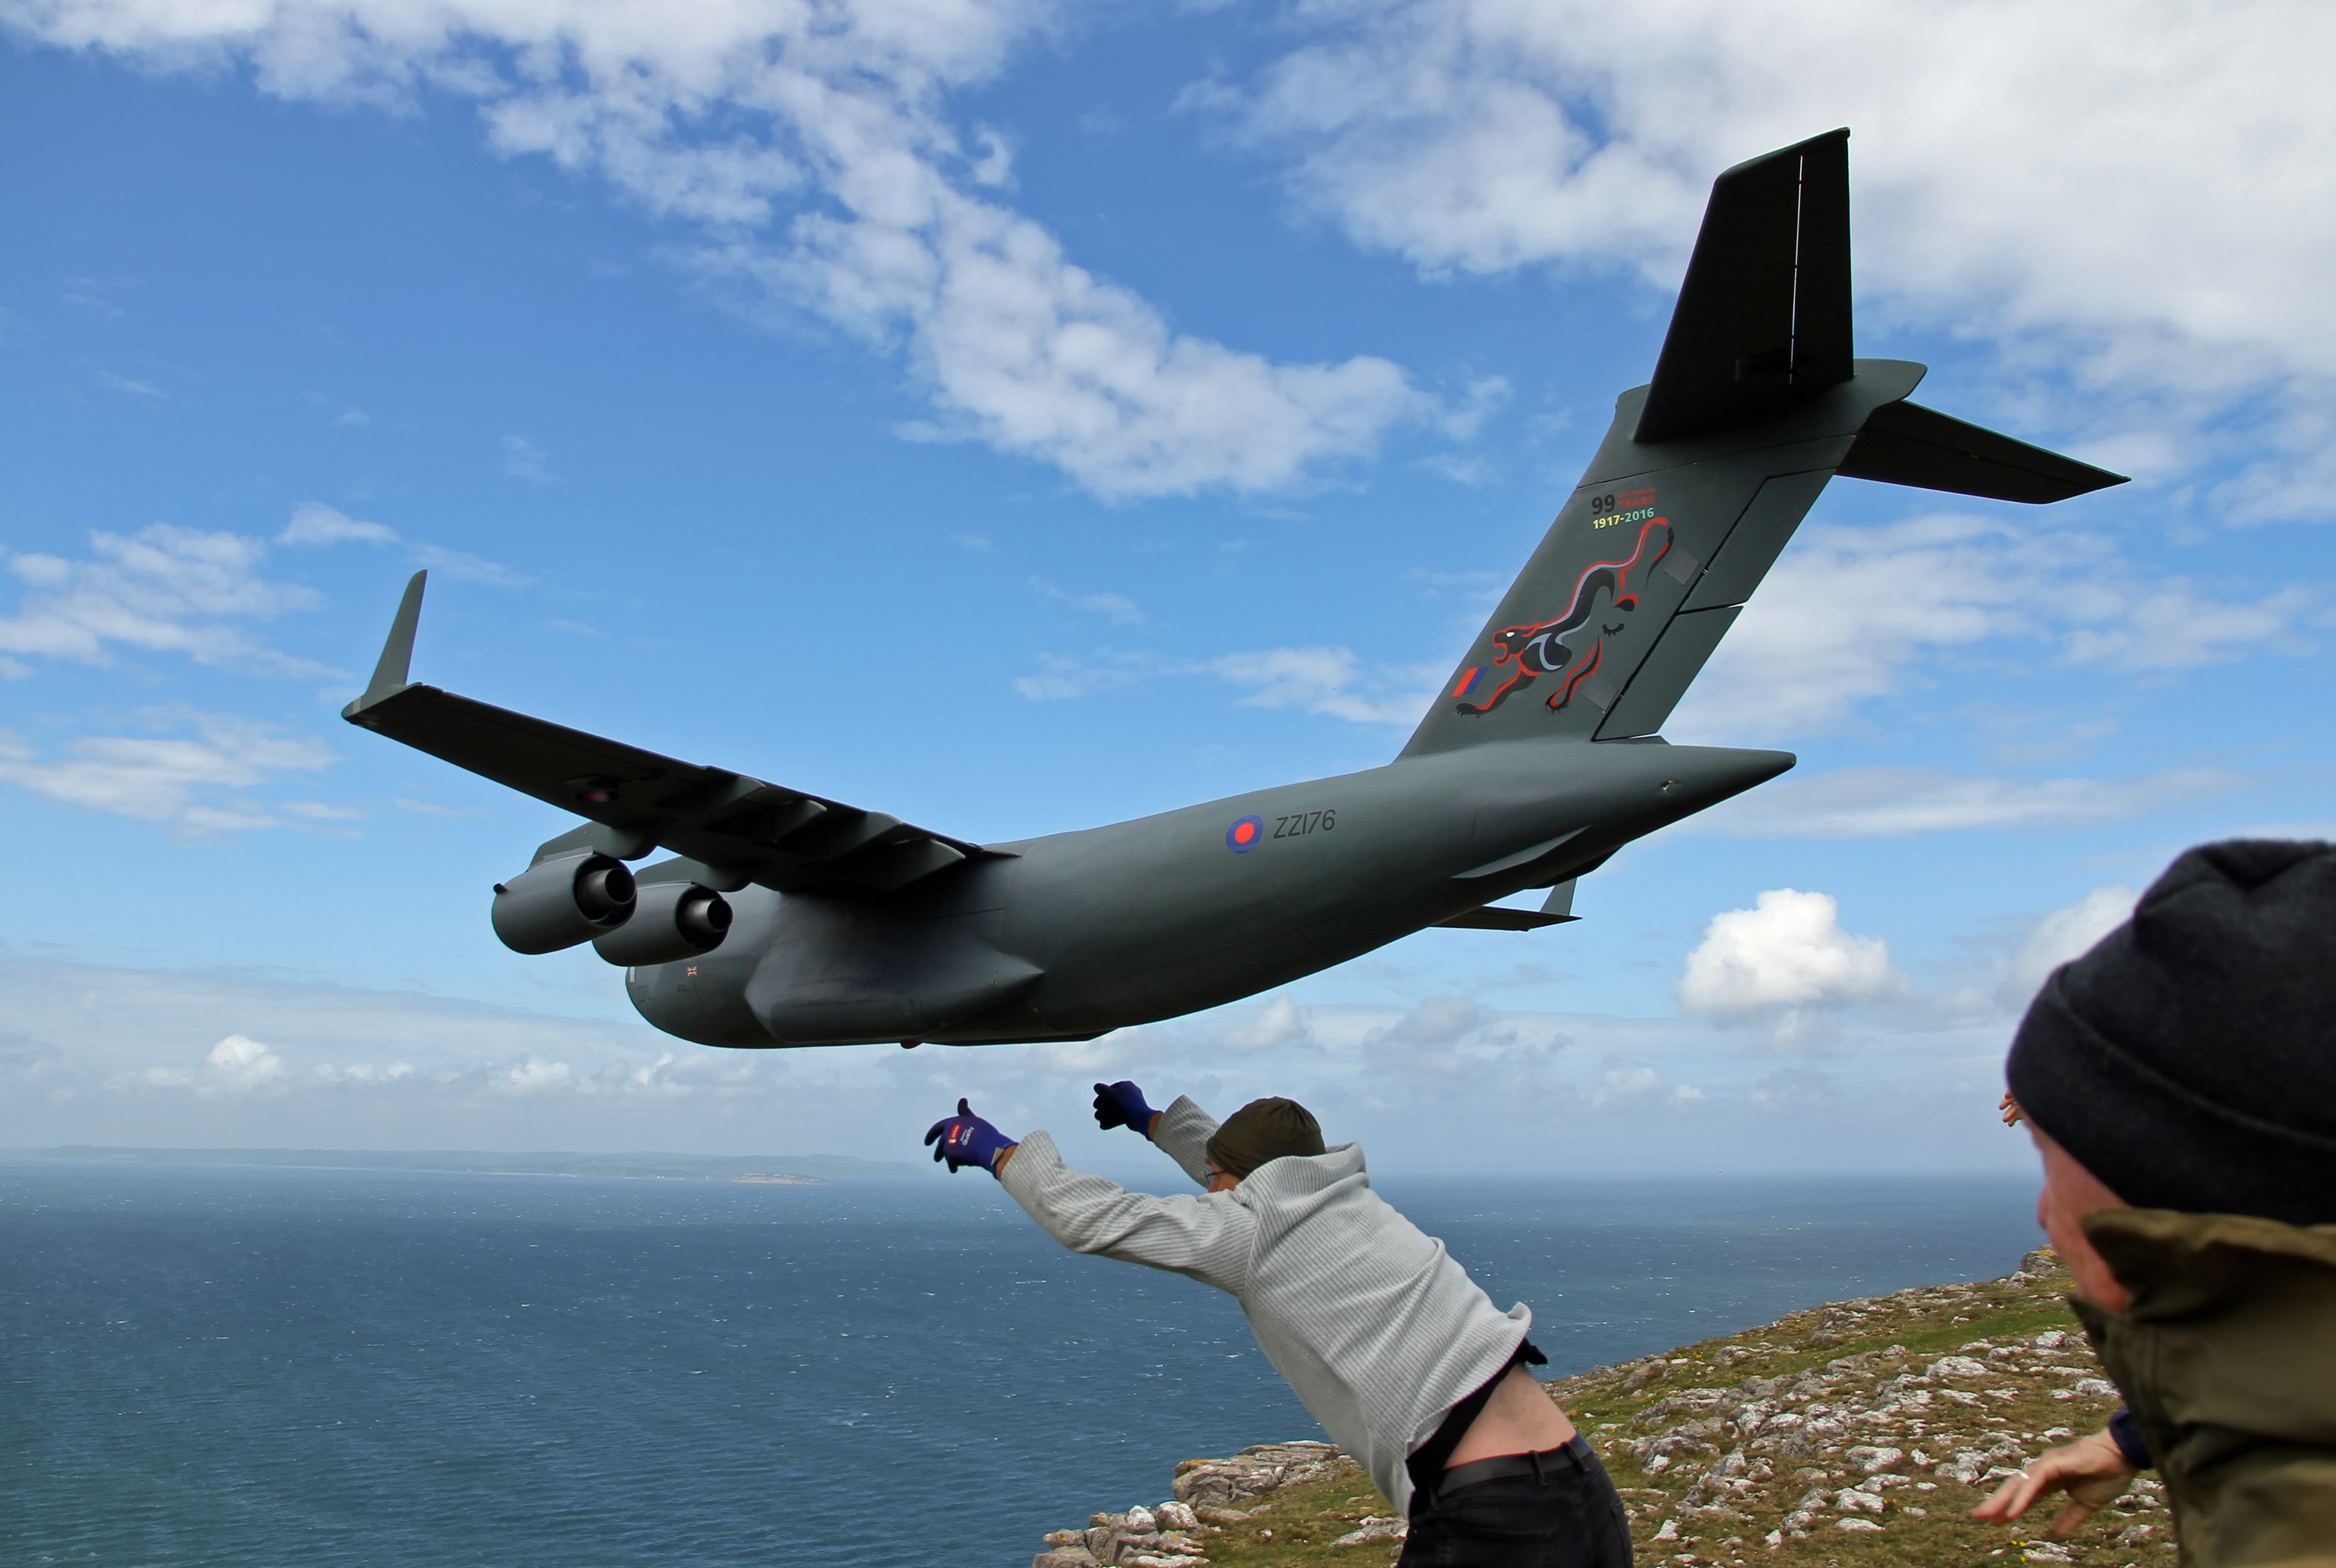
All rigged and ready (extra insulating tape to hold the engines on!), the hardy lads we'd corralled into meeting us there lofted the airframe above their heads, and gave her the heave-ho. The first launch showed some tail-heavy attributes, but nothing that couldn't be handled on trim, thankfully. A slight runaway in the dive, but not something that made me panic too much - I didn't even make any changes for the second flight.


All in all, I'm very happy with her. Quite manoeuvrable, not too fast, fairly easy to land even without touching the throttle stick for the huge flaps. I did give the flaps a go on the front side and she slowed up very quickly without too much pitching - at least they're there if I need them!


The second flight was cut a bit short due to the backup receiver losing signal.  I still have no idea why this was, and can only assume it's something to do with the "beta" pre-release RB30 redundancy bus I was using.  I really wanted the RB in there to keep an eye on the flap servo current as it has that feature built-in, but I have since found smaller servo-current sensors made by FRSky that I can daisy chain off the telemetry ports instead.  I'll lose the battery backup feature, but by adding two separate receivers, I can mitigate that risk through them using different batteries and cross-controlling the aircraft for redundancy.


All photos courtesy of Phil Cooke - many thanks Phil for capturing these great moments.

Some specs;
  • Based on ZZ176 based at Brize Norton when she wore her anniversary tail art.  
  • 32lbs AUW
  • 8 servos (2 ailerons, 2 flaps, 2 rudders, 2 elevators) all high voltage.
  • 2x 2 cell 4000mAh LiFe batteries, 
  • FRSky RB30 redundancy bus (for now...)
  • FRsky R8Pro & R9X receivers (2.4ghz and 900mhz links)
  • FRsky X20S transmitter
  • Flytron LED landing lights and strobing beacon (fantastically bright!)
Construction is foam veneered wings, then glassed.  Fuselage is white foam rear, built-up centre around the spar box, foam nose.  Fus foam parts then brown-papered and glassed.  ABS vac formed engine nacelles.  Everything sprayed in 2K high build primer, then 2K matt battleship grey.  Decals from Callie Graphics and Dave's Decals.


Thursday, 31 March 2022

Own design Boeing C17 Globemaster III for PSS - near disaster

The C17 eventually got to the slopes in 2021, but it wasn't the best outcome unfortunately. All rigged and ready for launch, the chucking crew lifted her and started to walk to the slope's edge, whereupon it was spotted that one of the flaps had dropped. Hmmmm, odd.


Putting the airframe on the grass, it was obvious something was awry as smoke was pouring out of the top hatches. Oh dear. To prevent an out and out burn-up on the slope-side, I quickly tore off the hatch and ripped the batteries out. The rain had started to come in at this point (another lovely Welsh summer) so I quickly de-rigged it and shoved it into the van, feeling rather let down after 5 years of build and endless hours of setup at home.


The post-mortem at home showed that the bottom of one of the Savox flap servos was quite severely melted, and also the loom had cooked up badly. The servo was either faulty or was somehow out of position trying to pull the flaps shut and pulled too much current in it's stalled state. To top it off, the brand new 10 channel redundancy receiver had melted solder from the battery input terminals blobbed everywhere inside, and was also a write off. Great.  

The airframe was kicked into the bottom shed, servos removed, waiting for the early spring bonfires.

Fast forward 6 months, and I've stopped sulking a bit, and Simon Cocker talked me round into getting her airworthy again.  This time I'm using a redundancy bus to monitor flap servo current on the TX, and it also has resettable fuses if anything pulls too much current on each channel.  The servos are back in, and the engine and wing attachment method has been improved greatly, meaning I should get less angry putting it together.  

So now everything is set and ready to go at the 2022 April PSSA meet - we shall see what happens!


Friday, 8 January 2021

Own Design C17 Globemaster III for PSS

 The catch up with build progressions continues, this time with the big Grey Moose.

I had painted the entire airframe, before realising that I had no efficient way of keeping the wings on still!  I had thought of using a method similar to the A10, but it's quite heavy.  

Anyway, the pictures below show it just before I retro-fitted the wing retention tongues, and I'm also sporting a beard (now gone!).


Just the engines and hatches to spray now, a final balance and controls set up. 


Friday, 27 April 2018

PSS C17, Antonov, and Typhoon progress

Work is progressing well on all sorts of parts.  I've been on a bit of a glassing binge recently, getting a few parts done every night if I can.  Here the Typhoon ailerons, C17 elevators and wingtips are all getting their first sides glassed :


Then the second side :


Rub down and clean-up.  Really liking the finish on these ailerons :


The Antonov has had its middle-fuselage-piece faced with 3mm birch ply, and the clamp plates secured :


The rear fuselage piece has had the facing started, hopefully everything will be ready for covering by Sunday.

Monday, 23 April 2018

C17 Globemaster III for PSS - garden shot

Just an update to show the C17 alongside the Antonov.  I have done a few bits on the C17 this weekend, including changing how the tail section is secured to the nose, which will make it quicker and more secure to put together.


Tuesday, 7 November 2017

Workshop change-around; C17 / Typhoon / Rafale progress

It's been a while since I've posted, but things have been hectic.  I've moved a lot of models around the house in preparation for the new extension being built (work started today!), so now I've moved my benches around, creating a just "work" area and a storage area for the server and models where I used to have a workbench.

"new" workbench from through the room which is now model storage


"old" workbench, unmoved but cleaned up
So all that means is that I now have a lot more clear room to build in, and all my tools can be right next to each other.  Here is the C17 tail, undergoing a trial fit now as I am adding a location tab at the front.


Here's the location tab - two layers of 3mm liteply wood-glued together, and gorilla glued into the tailplane assembly.  This will then fit inside a liteply pocket in the fin.


So whilst all that was drying...the Typhoon fuselage also had some love - I removed all the servos and wiring, and started on sanding down the paintwork.  A couple more hours on the sandpaper and I will risk a light primer coat to see how smooth she is.  I'll be building new elevators and rudder, as well as a new cockpit installation in this one.

Then lastly, the Rafale is nearing the end of it's build.  Here ready for bottom colour..


Bottom colour on!


Cockpit masked ready for primer...


Primer done!


Lot's more to do on all the airframes, but things are so much easier now with the reconfigured work area.


Tuesday, 8 August 2017

C17 Globemaster III build - glass at last, and U2 respray

The Big Grey Moose has at last visited the garage workshop for glass-work.  I was glassing the new A10 tailplane, along with the rebuilt Hawk fuselage, so thought I may as well get the big girl moved along a bit at the same time.

Underside first :


Then the top :


The U2 had some love just recently, and I forgot to add pictures.  All the little dings and scratches were first smoothed out with 3M red-spot glazing putty, then where needed, the airframe was re-sprayed in matt black.  I then added panel lines with a soft pencil, added some decals, then blasted satin lacquer all over.

Results :


I am very happy with that, and she should look a lot neater in the air now.

Friday, 14 July 2017

Where was I? Ah yes, more building - PSS F15 & C17

It's been a little while, and I can't remember where I got to with what builds are in progress on here, so some explanation is needed.

The HET F15 that I swapped with Matt Jones for a HET MiG 29 is now back in my possession.  He ran out of interest in it in the final furlong, and has nearly finished a large model of his own design for the slope, so I snapped it up at Weston Park model show.  Matt has done a lot of lovely work, including blanking off intakes, converting to a 2 seater, glassing the wings, making the fins plug-in, creating better tailplane bearings, installing servos, correcting oil-canning of the fibreglass etc etc.

There are just a few little bits to do and she will be ready for paint.  Some spot putty going in on the wing / fus joint :

Sanded down this side : 

Servo install all done.  Oh yes, all carbon pushrods have been made up and supplied too : 

A lovely twin seat cockpit, with ejector seats and pilots from Real Model Pilots : 

Canopy plug, hand made by Matt.  So one of those to mould by me : 

I am also finalising the fitment of the flaps on the C17, and prepping the U2 for a partial respray and decals.  

Speaking of C17, the engine halves came quite a few weeks ago, and I set about fettling the first one together :

Not too shabby, but I will blow over the joint with a guide coat before filling and rubbing back again: 

Right, that's it for now.  RIAT tomorrow and Sunday!

Monday, 6 March 2017

C17 Globemaster III build - Alignment checks build up and wing work

I assembled the Big Grey Moose again on Saturday, one of her last full assemblies before the glassing starts, to check for fit and alignment of the fuselage sections and tail / wing parallelism.  All went well, even though it was quite breezy.  I should have been flying really, but it wasn't that warm and I'd prefer to be in the workshop currently.


Weight isn't too bad at the moment - she is just over 30lbs.  Her biggest problem is the weight of the wings - they are monstrous.  If she flies well, I may have to put some thought into a built-up, balsa sheeted wing - perhaps using the "min-waste" method of rib production once I have the CNC router built up.

So with that reasonable success, I rearranged the top shed so I could get a forward fus / wing assembly in there to sort the anti rotation pins and root blend.

First rough sand.  The trick here is to sand down to the parcel tape I've used a parting medium, and no further :


Getting there, and first pull-apart (phew, that worked!) :


Remove the tape and a final polish up.  That'll do I think :


Now it's time to flip her over and do the other under side.


Thursday, 2 March 2017

C17 Globemaster III build - small updates

Just a small update, as things are progressing well I've not been taking that many photos unfortunately!

Rear fuselage assembly, all brown papered and ready for glass :


Starboard wing moving along quickly now too, there isn't much work left on it now :


Right, back to it!

Wednesday, 22 February 2017

C17 Globemaster III build - controls

Some odds and sods from the C17 build this week.  I had the entire fuselage assembly up on the ironing board again to check alignment and gaps, as I had the filler out I knew some bits needed attention :


An elevator pushrod installed.  These are pieced together from M3 studding, M3 ball links, and an M3 quick link.  The ball sits in my tufnol sheet horns, secured (or at least will be when she's done) with an M3 socket head cap screw and lock nut :


Here is the top rudder servo, in place with its link.  I have passed the link through the stern-post and onto an aileron torque rod horn that was let into the rudder and secured with epoxy and plastic tube.  This keeps the rudders completely horn-free externally, and the servo will be covered with a flat plate for access :


M3 pushrod hardware on ailerons next.  These were from RCWorld, listed as an M3 carbon pushrod kit.  I'll be getting those again, they're great!


So, that's all the control linkages done, apart from the starboard flap.  The starboard wing is moving along quickly, and all I have left to do is the flap canoes.  The rear fuselage has now had its 3rd (yes, 3rd..) skim of filler and sanding back, and at this point I think is ready for the brown paper.

Items ready to glass are :
Front fuselage
Tailplane
Elevators
Ailerons
Port wing
...and as mentioned nearly the rear fus / fin assembly.  I will have to get a move on with printing the engines!